
Webinars continue to gain traction as a powerful way for businesses and creators to reach and engage audiences online.
You can expand your reach even further by broadcasting your Zoom webinars live on YouTube.
This guide will walk you through how to schedule a webinar in Zoom and seamlessly live-stream it to YouTube for maximum exposure.
How to Broadcast Zoom Webinars on YouTube LIVE?
Step 1: Get Setup in Zoom and YouTube
To get started, you’ll need active accounts in both Zoom and YouTube.
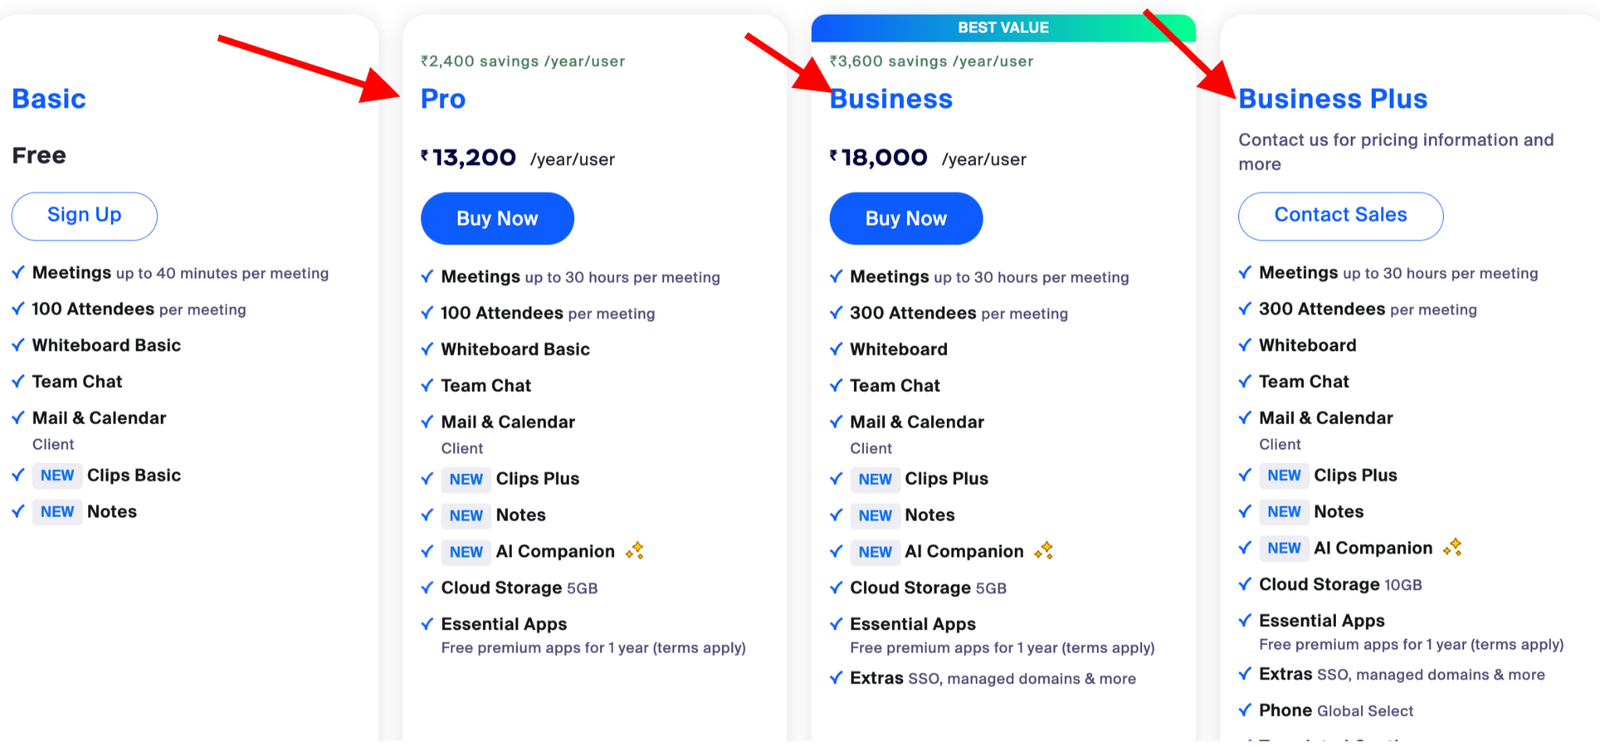
For Zoom, sign up for a paid Zoom account at the Pro level or higher in order to access webinar capabilities.
For YouTube, make sure you have a YouTube or Google account and have enabled live streaming.
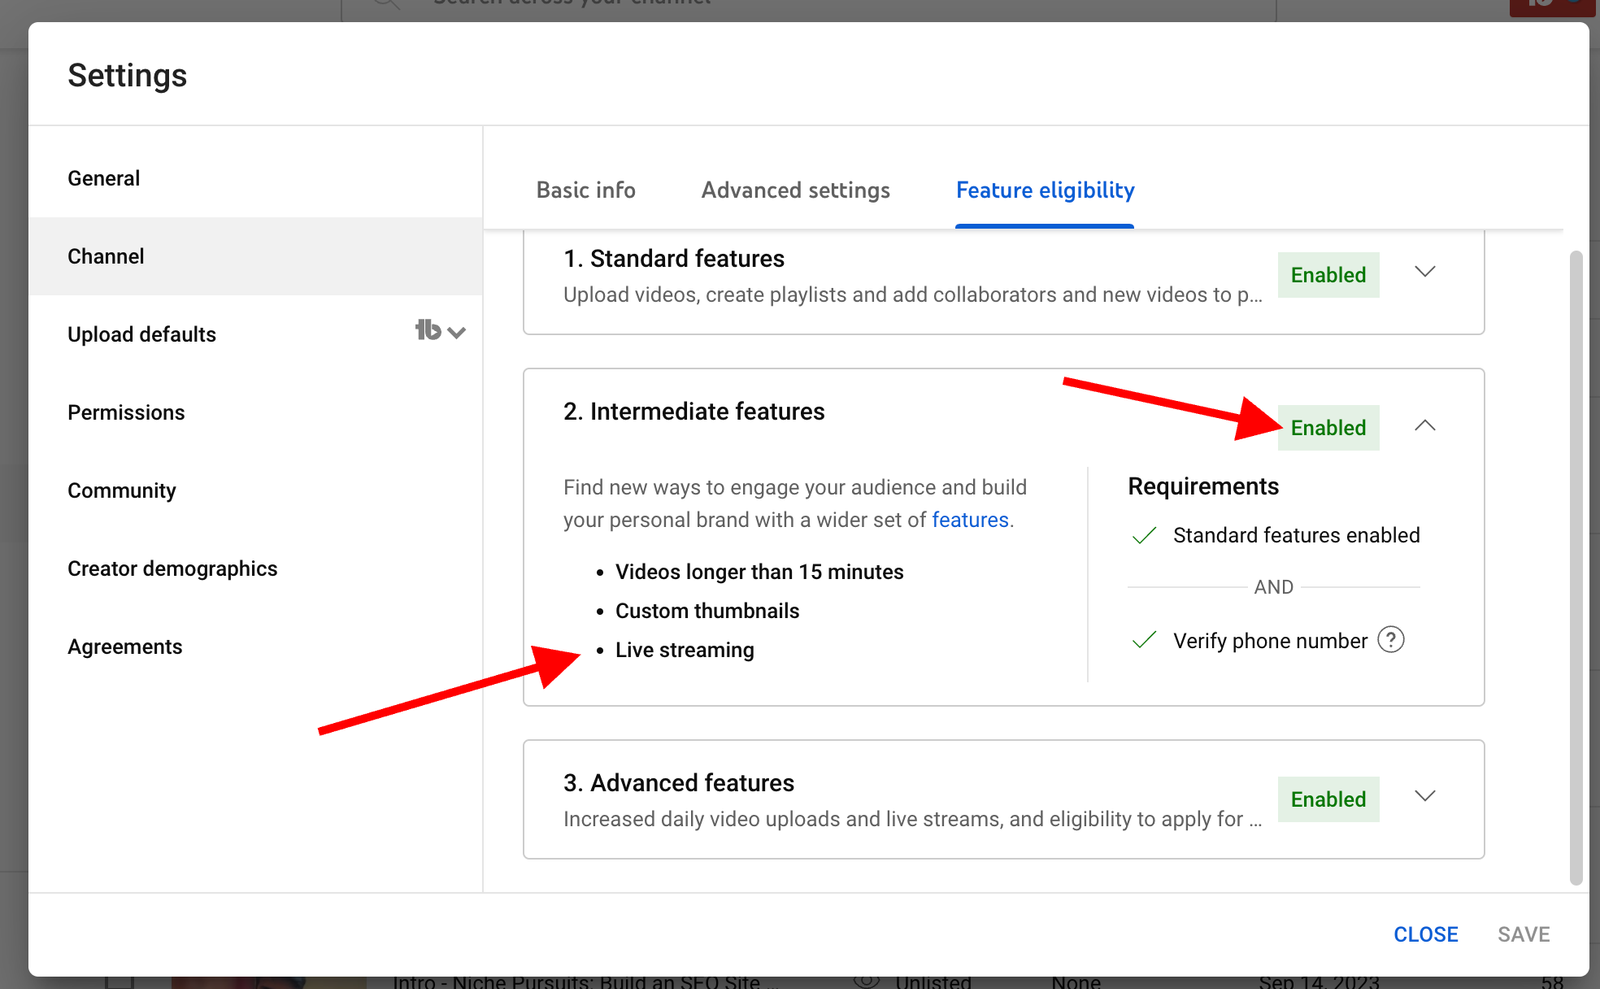
Access YouTube Studio and navigate to the settings. Click on “Channel,” where you will find the Feature Eligibility option.
Verify whether Intermediate features are already enabled. If they are, no further action is required.
If not, you will need to meet specific criteria to enable this feature.
You’ll also want to create a YouTube channel for hosting your webinar streams. It’s free.
Step 2: Configure Your Zoom Webinar Settings
Once signed into your Zoom account online, navigate to the “Webinar” tab on the left sidebar.
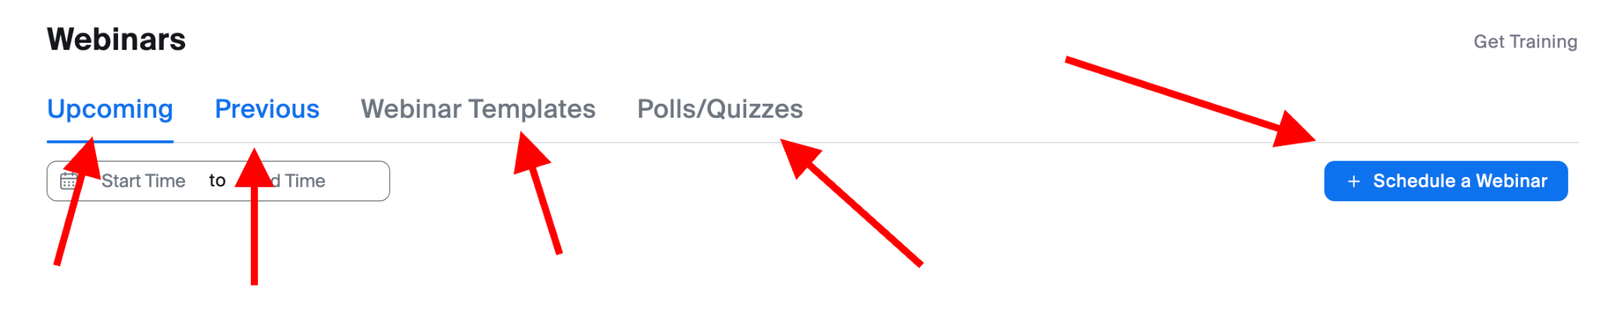
This is where you’ll manage webinar scheduling, registration, reporting and more.
Under the “Settings” sub-menu, you’ll want to enable the following options:
- Registration – Require registration so you can collect attendee information
- Live streaming – Check the “Enabled” box to turn on streaming integration
- Post webinar – Enable auto recording to cloud and on-demand viewing
Step 3: Enable Streaming on Zoom Account
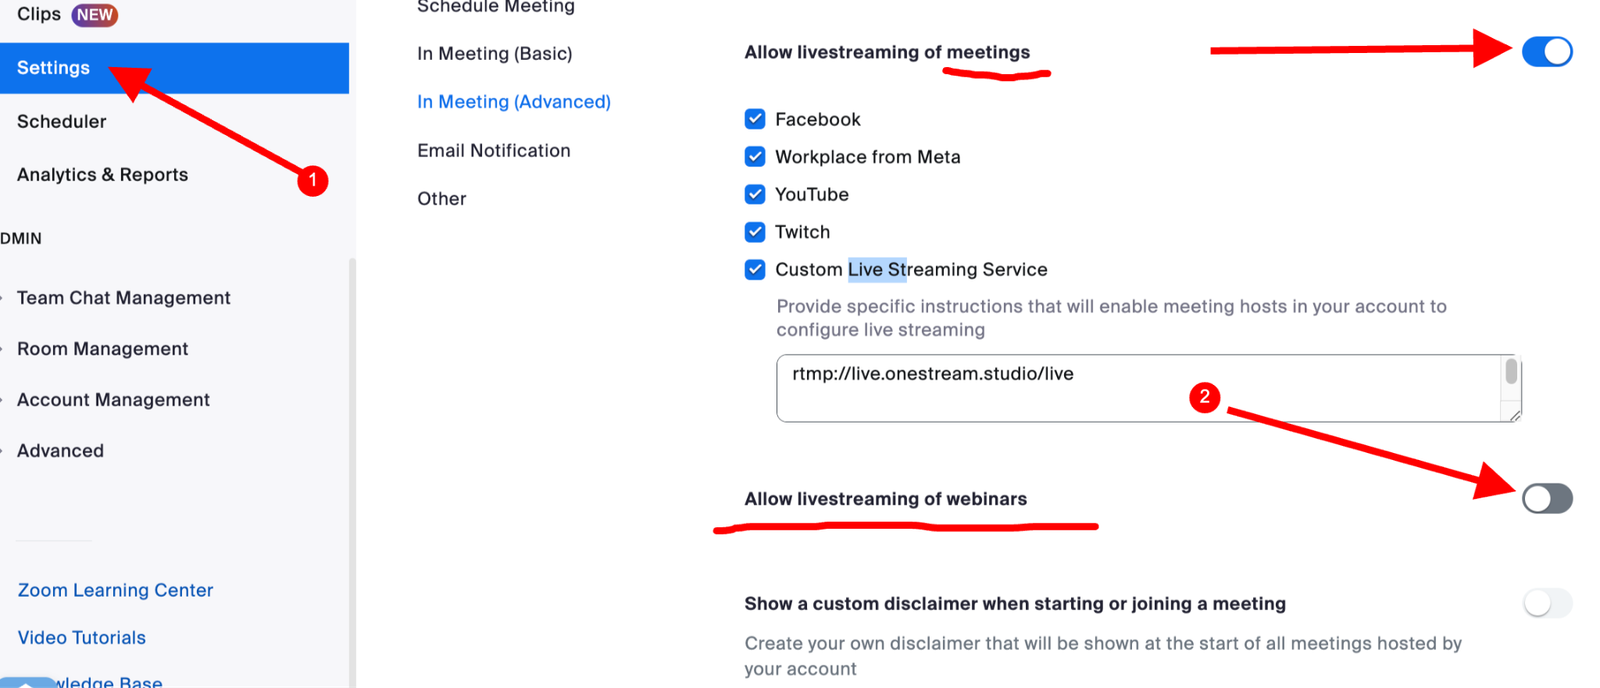
Go to Settings tab on the left menu, look for “Streaming of webinars.”
Navigate to the Settings tab, where you’ll see a plethora of options. Use a keyboard shortcut by typing CTL+F/CMD+F (for Mac users), you’ll see a search box.
Enter “Streaming” in the search box, and you’ll see the following options. Refer the screenshot below.
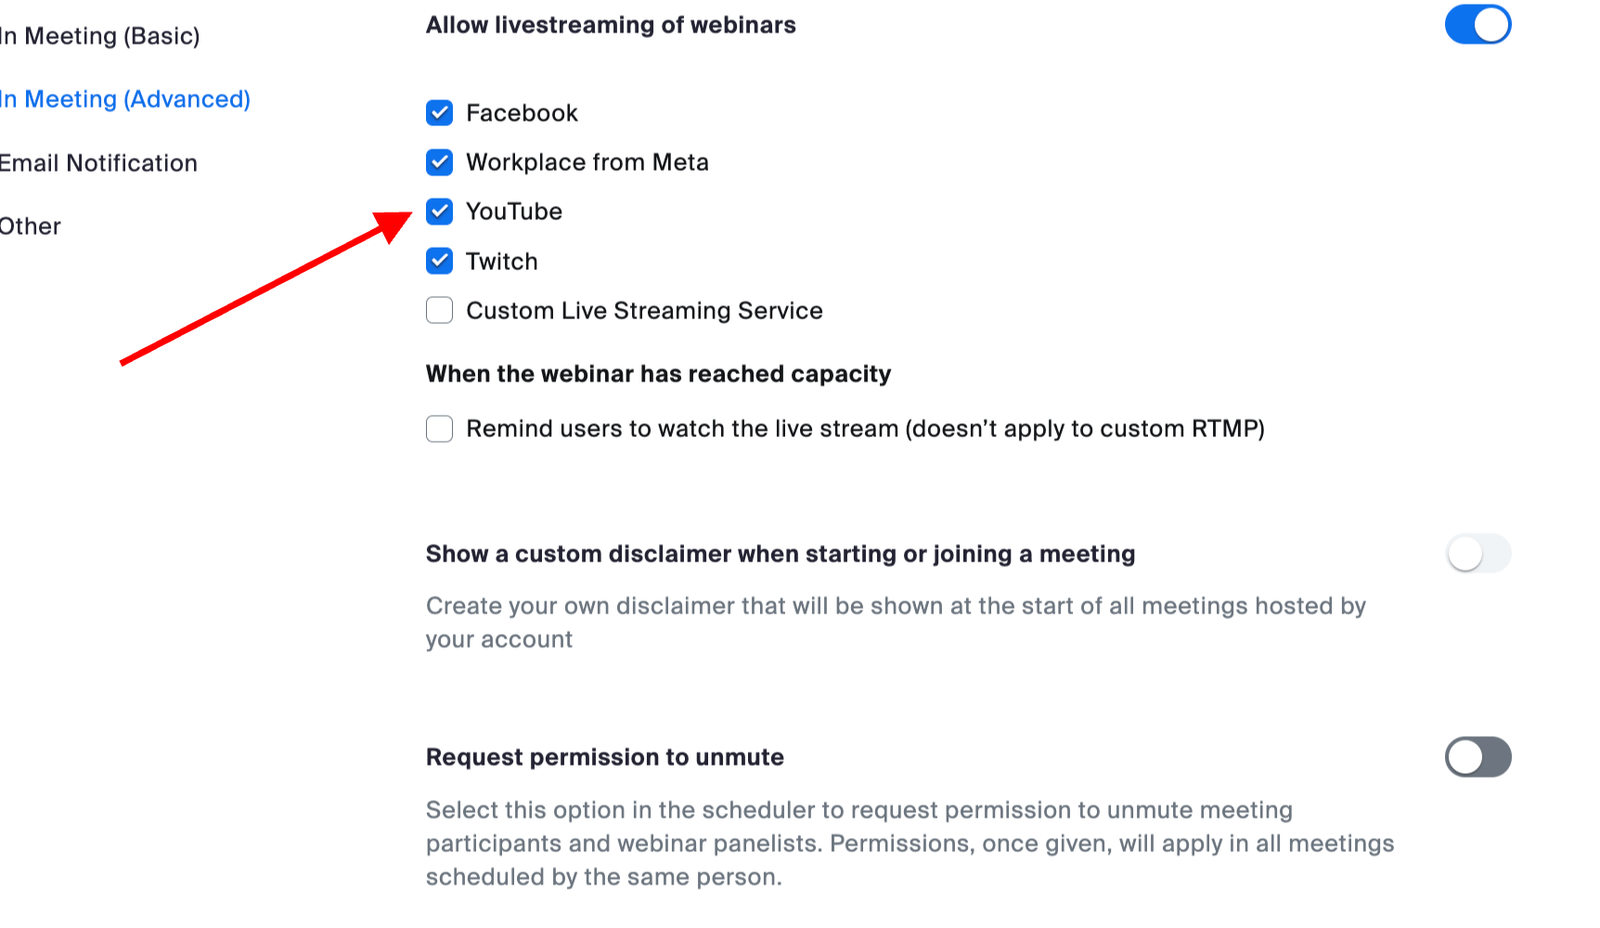
Select YouTube as the service. That’s all you need to do to connect YouTube with your Zoom account.
Step 4: Schedule Your Webinar in Zoom
Return to the main “Webinars” page and click “Schedule a Webinar” to begin.

Walk through the settings to:
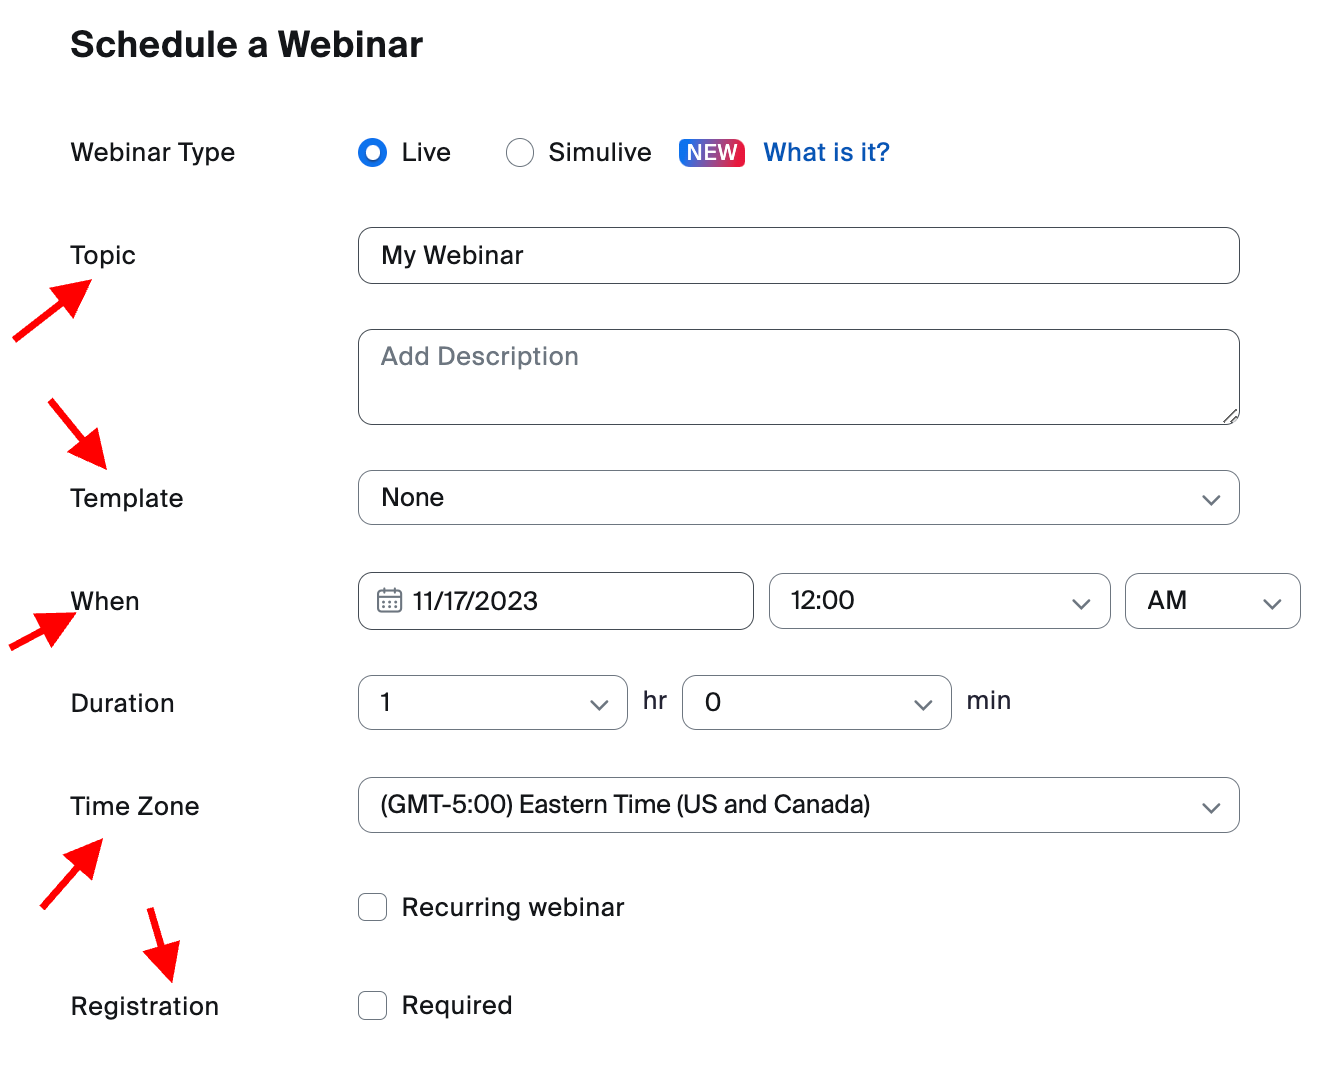
- Give your webinar a title and description
- Set a date, time and duration
- Enable registration and other options
- Assign hosts and panelists
Under the Live Streaming section, make sure “Stream to a YouTube event” is checked to activate the integration.
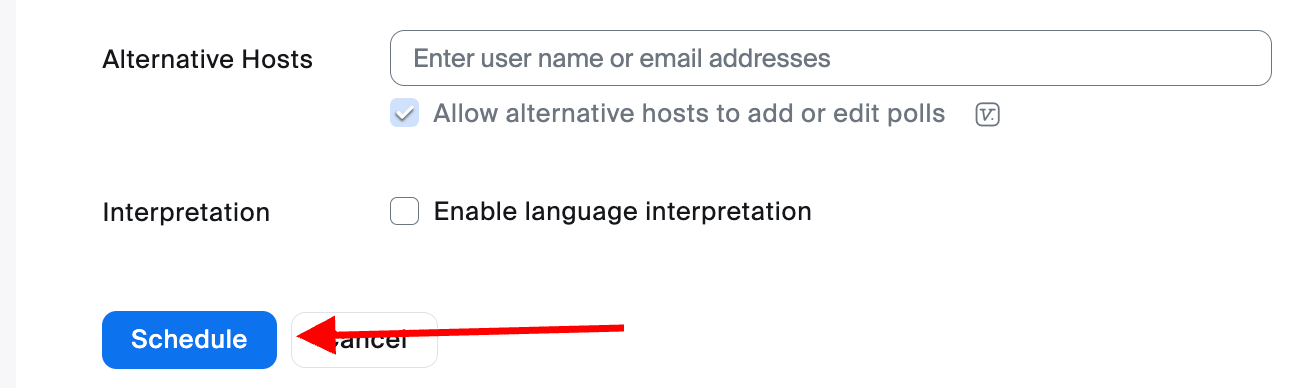
Finish configuring any other settings for your webinar and click Schedule when ready.
Step 5: Customize Registration and Promotion
With your webinar now scheduled in Zoom, it’s time to customize registration and promotion.
Navigate to “Registration” in the webinar menu. Here you can create custom registration questions, consent agreements, and more.
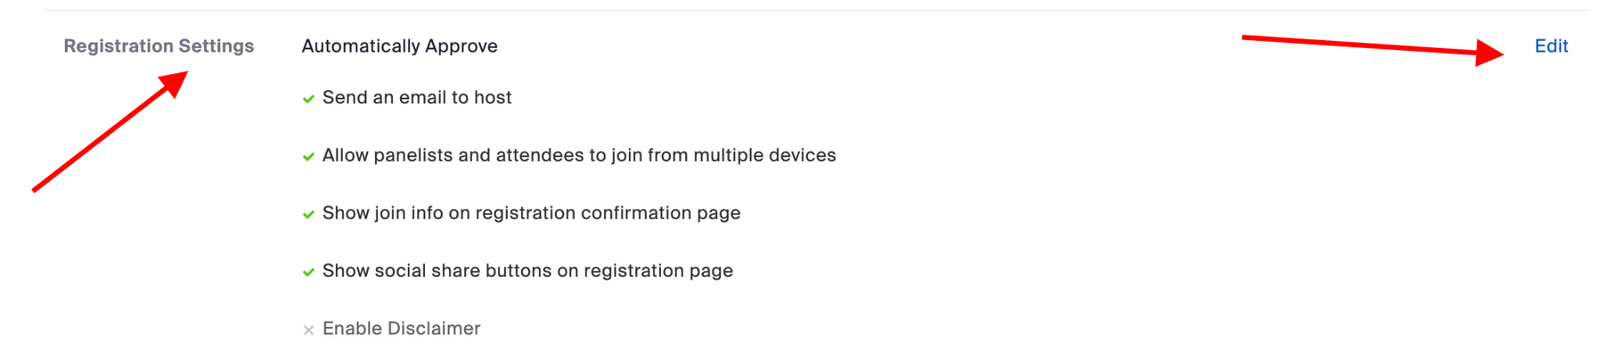
Click on “Email Settings” to customize registration confirmation emails, reminder emails, and follow up messages to registrants.
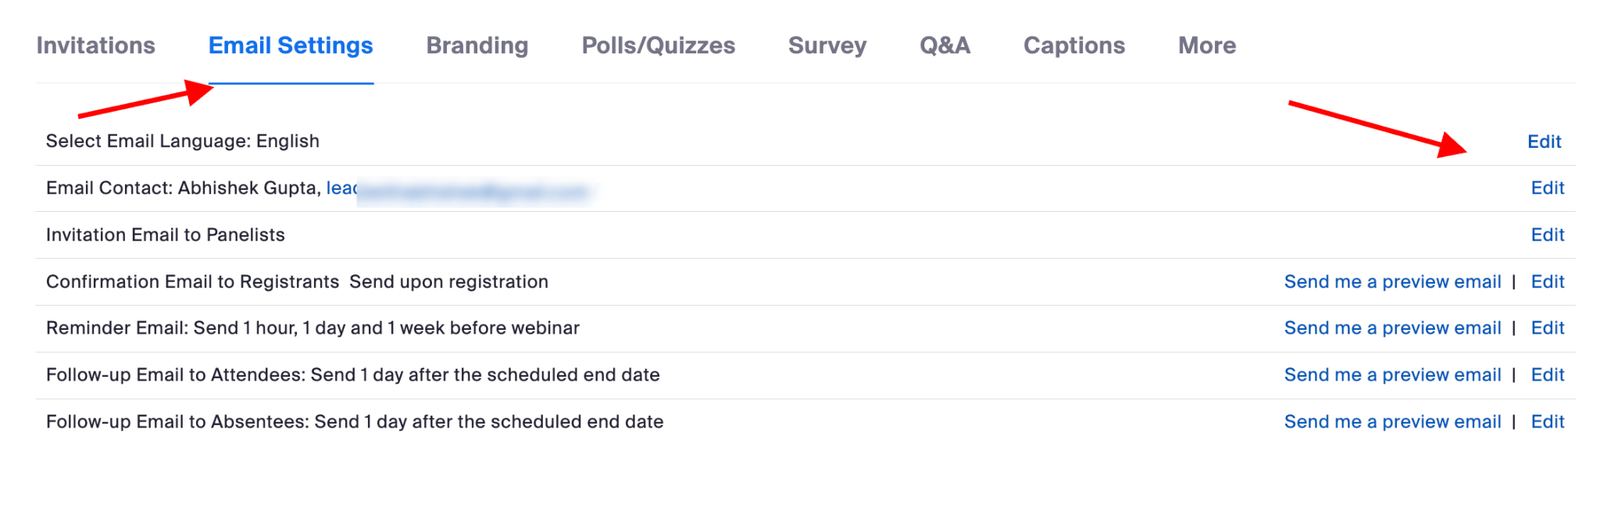 Use these custom emails along with your website, social media, and other channels to drive registrations. Share the Zoom registration URL prominently.
Step 6: Connect the Zoom Webinar to Your YouTube Stream
We have completed all the major steps. Now you need to start the webinar.
Go to Zoom >> Webinars >> Click Start
Now, it will take you to Zoom application. When you’re in the Zoom application. You would see three dots at the bottom corner.
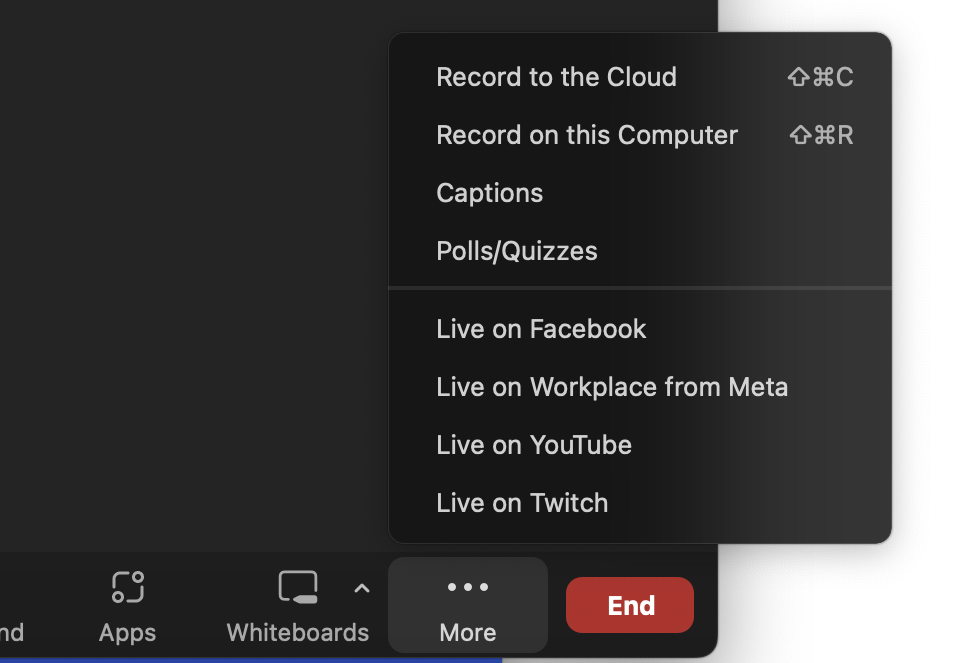
Click on that, and you’ll find the options to go LIVE on YouTube. Click on it.
Sign in to your Google account, ensuring that you sign in with the Google account connected to your YouTube channel.
In the next step, you’ll see the option to select the channel. Choose the channel on which you want to Go LIVE.
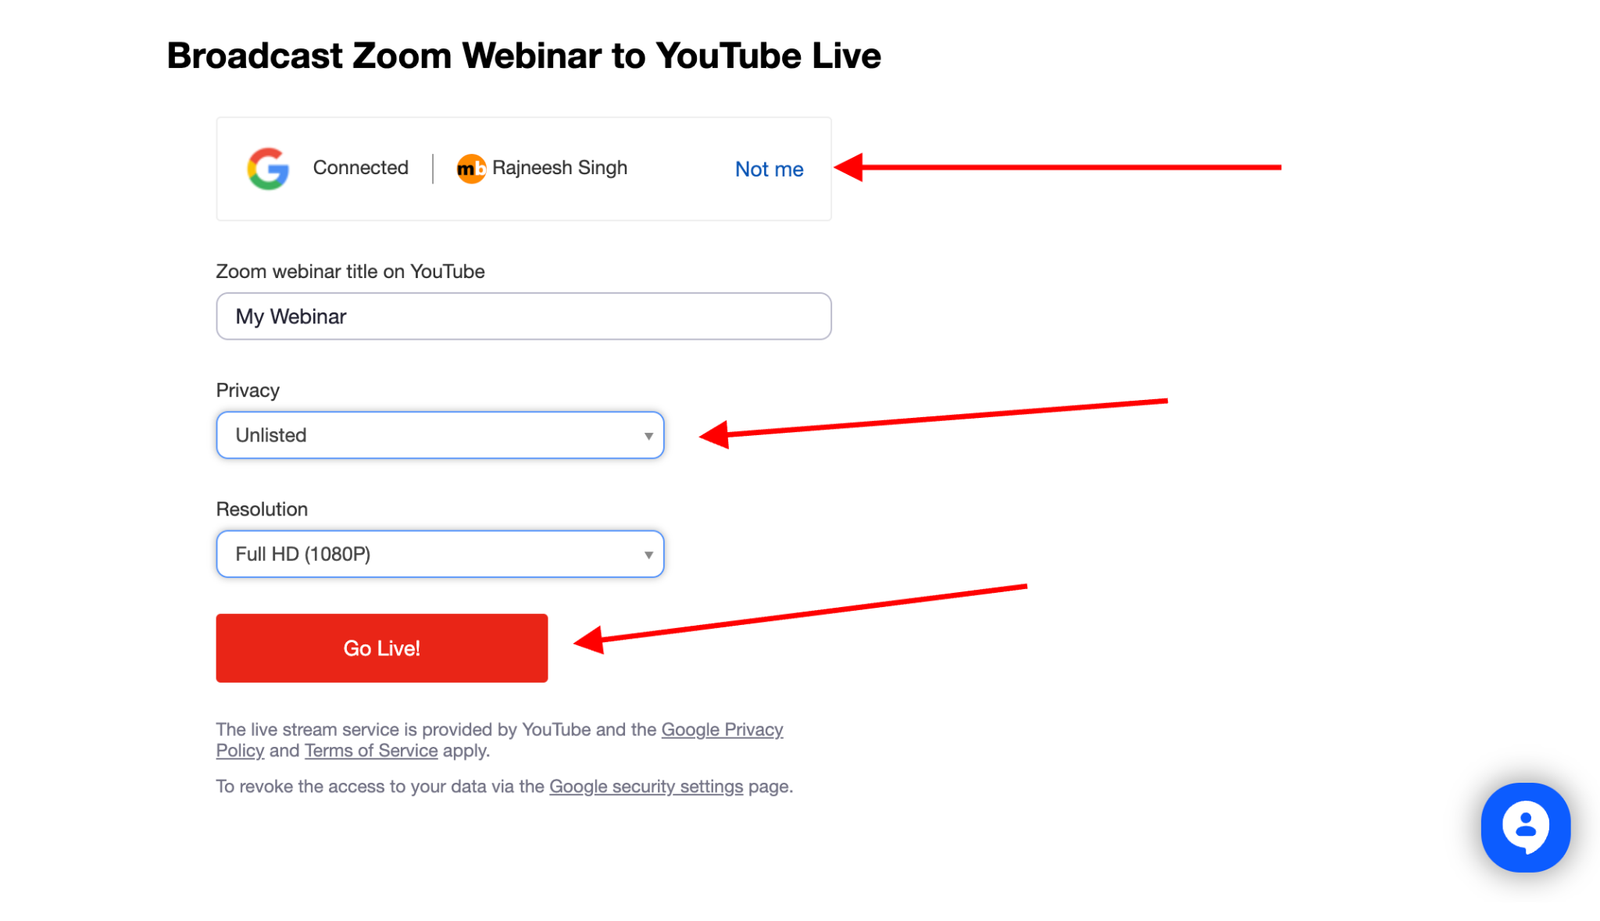
You can see Webinar Name, choose whether you want this session to be LIVE or unlisted or private.
Choose the resolution. Click on Go LIVE.
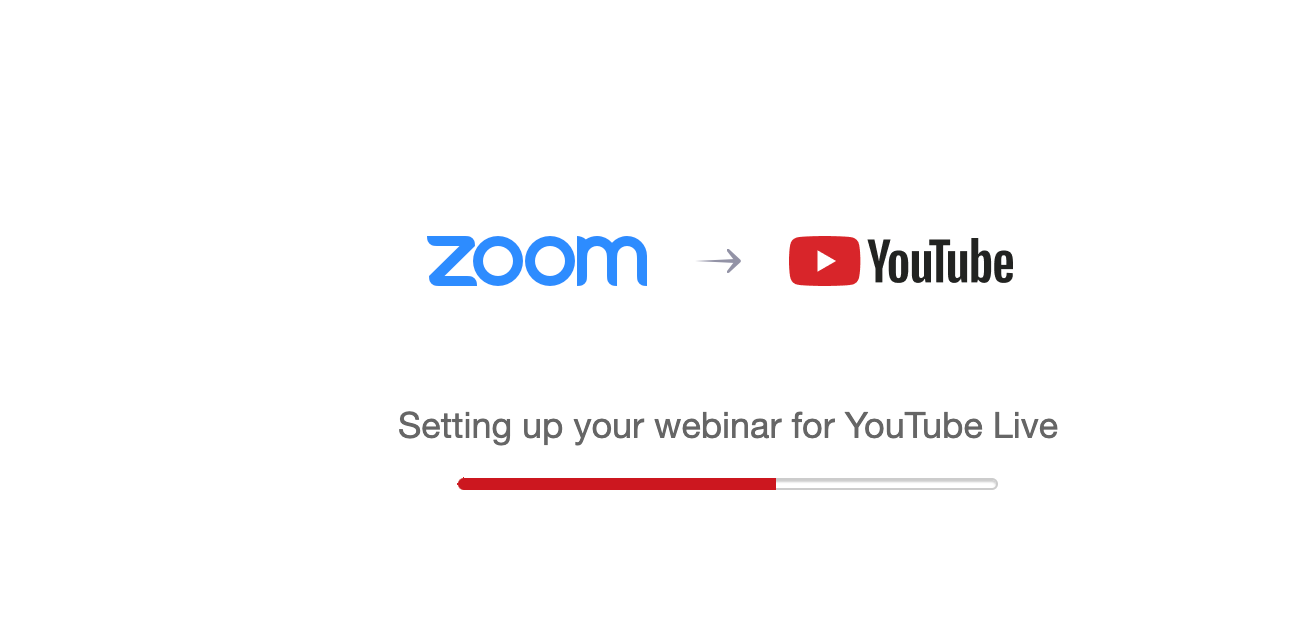
For a few seconds, you’ll see this type of interface, redirecting you to the Zoom application.
Within the Zoom app, you’ll notice that you’re now LIVE on YouTube. You can also stop the YouTube LIVE directly from the Zoom application.
Step 8: Run Your Webinar and Go Live!
Once the date and time arrives, start your webinar in Zoom as normal.
Go LIVE on YouTube. Zoom will automatically detect the start and push your video and audio out live to the YouTube stream.
Present, share your screen, engage the audience through Q&A and chat.
After the live event ends, the YouTube video will be available as an on-demand replay on your channel.
You can also download the recording from Zoom.
Getting the Most from Your YouTube-Streaming Webinars
Streaming your Zoom webinars on YouTube is a great way to maximize reach.
Here are some additional tips:
- Promote extensively – Spread the word far and wide by posting your YouTube webinar link on social media, email, websites, and other channels.
- Optimize discovery – Use popular keywords in title, description, tags, and metadata so people can find your webinar in YouTube search.
- Cross-promote -Mention your YouTube stream and channel during the Zoom webinar so attendees subscribe.
- Repurpose content – Reuse webinar clips as shorter videos or create summaries, highlights and previews.
- Analyze metrics – Study YouTube analytics and Zoom reports to improve future webinars.
Using the power of Zoom and YouTube, you can take your webinar reach and impact to the next level.
Give more people the opportunity to engage with your valuable event content.
So what are you waiting for?
Schedule your next webinar in Zoom and go live on YouTube today!